If your laptop won’t connect to WiFi, you’re bound to become frustrated as you won’t be able to carry out your internet-related tasks.
Your laptop’s connection can be severed for several reasons like your Wi-Fi not being on or your router shutting down.
In any case, our experts are here to help you resolve why your laptop can’t connect to WiFi. We’ll be discussing the possible reasons why your laptop isn’t connecting to Wi-Fi while providing you with the ideal solutions to the problem.
Why Won’t My Laptop Connect to WiFi?
There are many different reasons why your laptop’s Wi-Fi connection may not work properly, including an inactive router, incorrect WiFi passwords, outdated Wifi driver, or even an unsupported WiFi. Let’s look at these factors in more detail:
– Airplane Mode or Wi-Fi Turned Off
If your computer’s Wi-Fi is turned off or the network is on airplane mode, you won’t be able to connect to the internet. You want to check your computer’s network interface to see if it’s on airplane mode or if the Wi-Fi access is off.
Turning on your Wi-Fi or shutting off airplane mode can help resolve this problem.
– Inactive Router
If your router is dead or inactive, you won’t be able to access the internet. Make sure to check whether or not your router is functioning properly before deciding that your computer can’t connect to the Wi-Fi.
– Incorrect Wi-Fi Password
Inputting an incorrect Wi-Fi password will stop your computer from connecting to your router. You’ll need to verify the Wi-Fi password and try reconnecting your computer.
– Outdated Wi-Fi Driver
Another reason why you may experience laptop not connecting to WiFi is an outdated Wi-Fi driver. Outdated drivers are known to malfunction, thereby causing connection problems. Simply updating or uninstalling and reinstalling your Wi-Fi driver can help you fix the problem.
– Unsupported Wi-Fi
If the wireless network you’re trying to connect your computer to doesn’t have the same protocol as your PC, your computer won’t connect to the network. You need to make sure that both your PC and router have the same protocols so there can be a seamless connection between both devices.
– Long Distance From Router
Your router may be one with a short range. If that’s the case and your home office or the location of your computer is far from the router, you’re bound to have disconnection issues.
You can try changing the frequency of your router to 2.4GHz if it’s on 5GHz, move your computer closer to the router, or change your router to one with an extended range.
How To Fix Laptop Not Connecting to Wi-Fi
There are several methods you can try in order to resolve why your computer isn’t connecting to Wi-Fi, including:
– Verifying That Your Wi-Fi Is On
The first and most obvious solution you want to try is to make sure your computer’s Wi-Fi feature is turned on. You may have accidentally turned off your Wi-Fi or forgotten to turn it on.
Follow the steps below to check whether or not your computer’s Wi-Fi is on:
- Go to the bottom left corner of your start page and click on the internet or Wi-Fi icon.
- Next, check to see if the Wi-Fi icon is blue.
- If it’s not, your Wi-Fi is off and all you have to do is click on the icon and wait for it to turn blue.
- Also, check to see if the plane icon on the right is blue.
- If it’s blue, your computer is on airplane mode.
- Turn off airplane mode by clicking on the plane icon.
- Now check to see if your computer’s Wi-Fi works properly.
– Use the Windows Troubleshooter
The Windows troubleshooter is a built-in Windows tool that can diagnose and fix many different OS-related issues. You can definitely use the Windows troubleshooter to diagnose and fix Wi-Fi-related problems easily.
Here are the steps to follow:
- Click on the search icon button beside your start menu and search for “Troubleshooting.”
- Double click on the Troubleshooting option in the search results.
- On the next window, select “Network and Internet” then click on “Internet connections.”
- Now, select “Advanced” and choose “Run as administrator” from the list of options.
- Check the box beside “Apply repairs automatically” and click on the “Next” button.
- You may get a prompt from a user control window — click on yes.
- Select “Troubleshoot my connection to the internet” and click the next button.
- Follow the on-screen instructions and the troubleshooter will start scanning your computer for possible problems.
- Once the scan is done, the troubleshooter will provide you with a recommended solution as well as the details of the problem.
- Read the results and apply the recommended solution.
- Once you’re done, check to see if your Wi-Fi is now working correctly.
- If your Wi-Fi is working correctly, simply close the troubleshooter and continue with your tasks.
- On the other hand, if your Wi-Fi still isn’t working properly or if the troubleshooter doesn’t detect any issues, the next solution below may be the right fix for you.
– Shutdown and Restart Your Devices
Sometimes, a simple fix like shutting down your router and laptop may be all you need to do to fix WiFi not connecting on laptop or PC, especially if you hibernate your computer a lot.
All you have to do is:
- Save every unsaved work on your computer and close all opened apps.
- Click on your start menu and select the power icon.
- Select “Shut down” from the list of options.
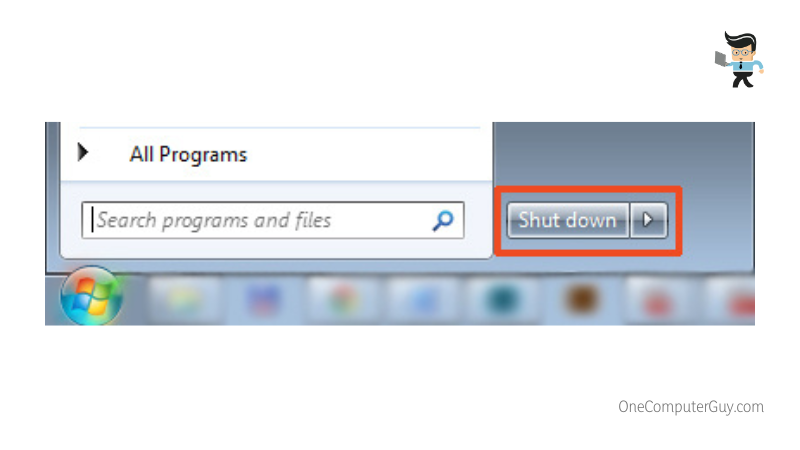
- While your computer is shutting down, disconnect every peripheral attached to your PC.
- Unplug your power supply unit and shut down your router or modem.
- Once you’re sure that everything is off and not operational, wait for about 30 seconds and plug everything back into your power connector.
- Turn on your router and computer and check to see if your Wi-Fi now works correctly.
- Also, try to connect your other devices to the router to make sure the problem isn’t router-related.
- If no other device can connect to the router, then you may need to seek assistance from your ISP.
– Reinstall Your Network Adapters
Completely uninstalling and reinstalling your network adapters will reset all wireless configurations and clear out the network registry, thereby refreshing your adapter like it’s brand new. With this refresh, you’ll be able to gain access to the internet through your Wi-Fi and resolve why your laptop suddenly can’t connect to WiFi.
Here are the various steps on how to uninstall and reinstall your network adapter:
– Find Out the Properties of Your Wi-Fi Adapter
First, you need to find out the details of your Wi-Fi adapter as your device manager can contain several network adapters.
You can find out the details of your adapter by following these steps:
- Click on the internet icon on your taskbar.
- Right-click on the Wi-Fi icon.
- Select “Go to settings” from the options.
- In the settings window, select “Hardware properties.”
- Check the “Description” tag for the name of your Wi-Fi adapter.
– Reinstalling Your Wi-Fi Adapter
Once you have the name of your Wi-Fi adapter, follow the steps below:
- Right-click on your start menu and select “Device Manager” from the list of options.
- Navigate to “Network Adapters” and double-click on it to expand the list of drivers under this category.
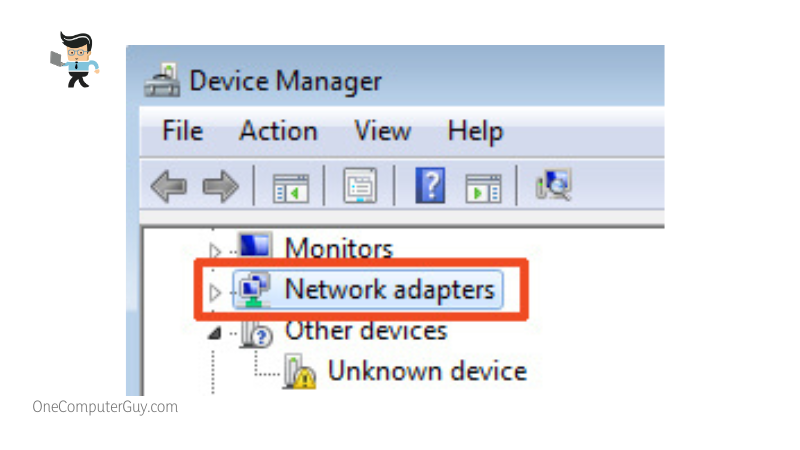
- If you have more than one adapter, you’ll get a list of network drivers and you’ll need to find out the right one your computer is using by utilizing the steps above.
- Now, right-click on the right Wi-Fi driver and select “Uninstall” from the list of options.
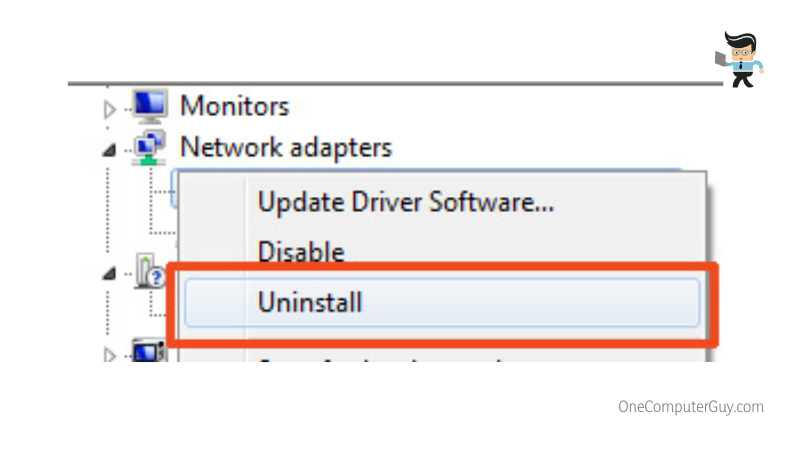
- Click on the “Ok” button and follow the on-screen instructions to completely remove the driver from your device.
- Once the uninstallation process is complete, go back to the list of network adapters to check whether or not you can find the name of your Wi-Fi adapter.
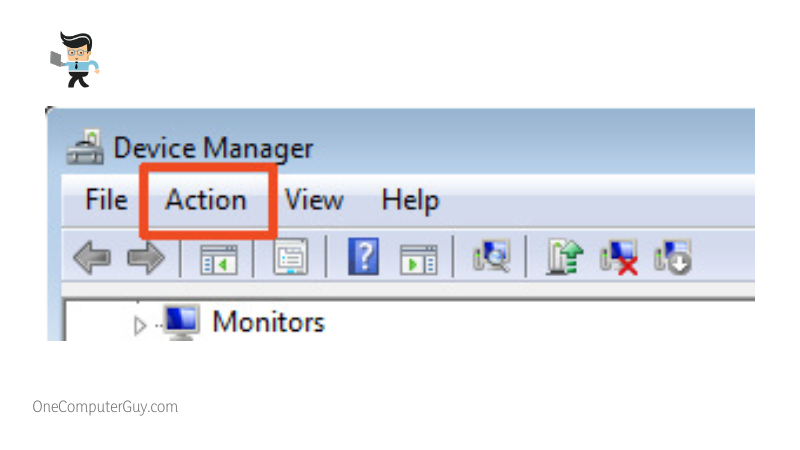
- Once you’ve verified that the driver has been removed, select “Action” from the options at the top of the device manager window.
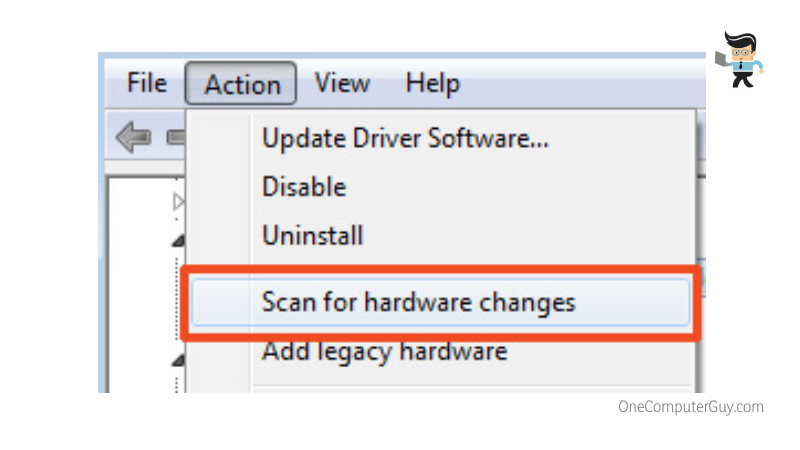
- Choose the “Scan for Hardware Changes” button from the list of options.
- If there’s no drop-down menu when you click on “Actions,” select the monitor icon underneath the “Action” option to scan for hardware changes.
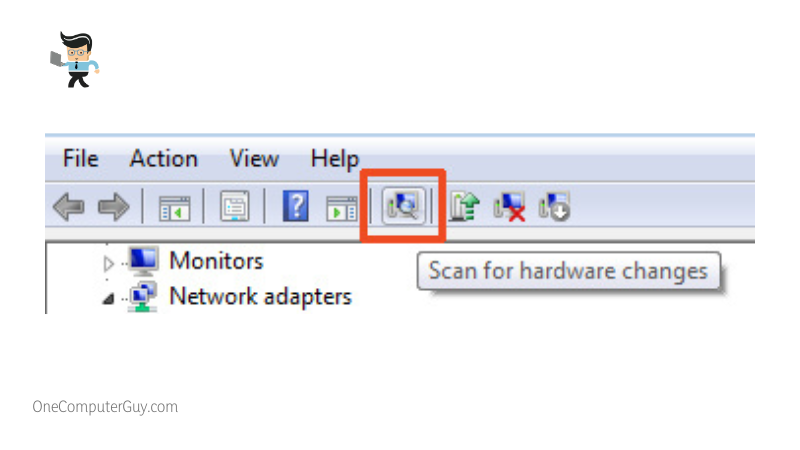
- Once your computer scans for hardware changes and detects that your Wi-Fi adapter is missing, it’ll automatically reinstall the adapter and you’ll be able to find it on the Network adapters’ list.
- Once you’ve verified that your Wi-Fi adapter is back on the list, close all windows.
- It’s time to restart your computer. Check to see if your Wi-Fi now works properly.
– Update Your Wi-Fi Drivers
Downloading and updating the latest driver for your software may be the best solution to fixing laptop unable to connect to WiFi. But since your network isn’t working, you may be wondering, how then do you download and update your drivers?
First, you need to write down your laptop’s brand and model. Then go to your computer manufacturer’s official website and download the driver using a different computer. Once the update has been downloaded, transfer it to your computer through a flash drive or memory card, and install it on your computer.
Always utilize the official website for your driver updates to avoid downloading viruses and malicious software disguised as software drivers on third-party websites. With that being said, there are times when your computer’s manufacturer may not have the exact Wi-Fi driver you’re looking for.
In a scenario like this, you’ll need to follow the steps below:
– Downloading Updates From the Driver’s Manufacturer Website
- Right-click on your start menu and select “Device Manager” from the list of options.
- Navigate to the “Network adapters” category and double-click on it to expand the drivers’ list.
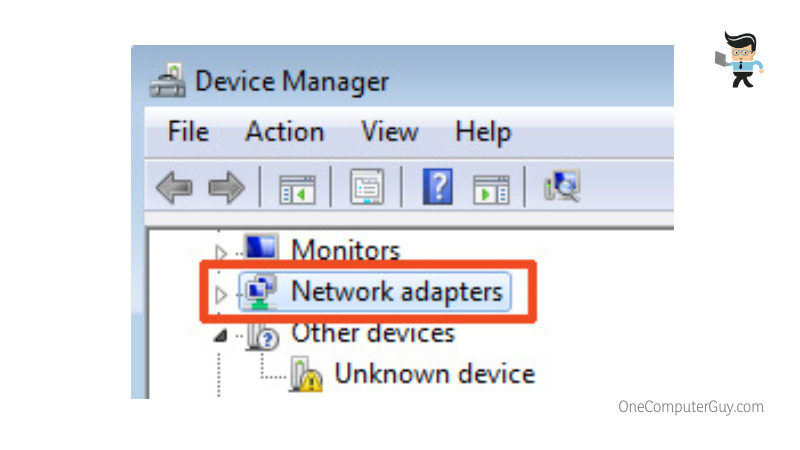
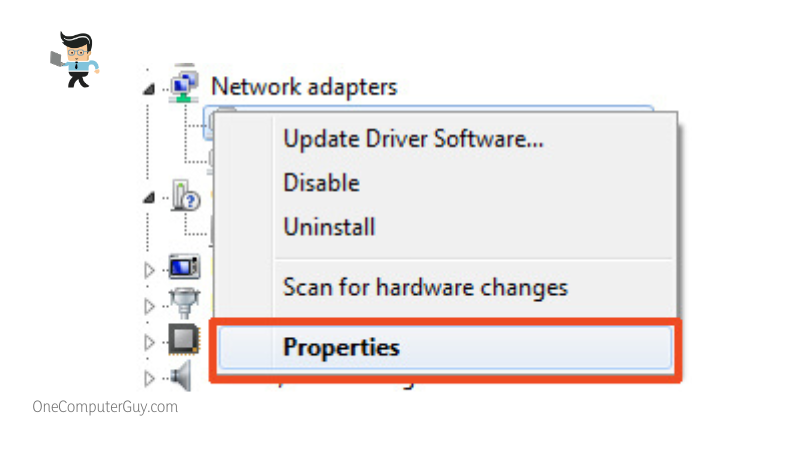
- Right-click on your wireless adapter and choose “Properties” from the list of options.
- On the next window, select the “Driver” tab and write down the “Driver date” and “Driver provider” on a piece of paper.
- Now find a computer with an internet connection and go to the driver provider’s website.
- Search the download or driver section of the website for the updated version of your driver.
- Make sure that the release date of the updated version is more recent than the one you wrote down.
- If you find an updated version on the provider’s website, download it, transfer it to your computer, install it, and restart your PC.
– Downloading Updates From Third-party Websites
- If you can’t find any update on the provider’s website or there’s no provider name in the “Driver” tab, go back to the “Properties” window.
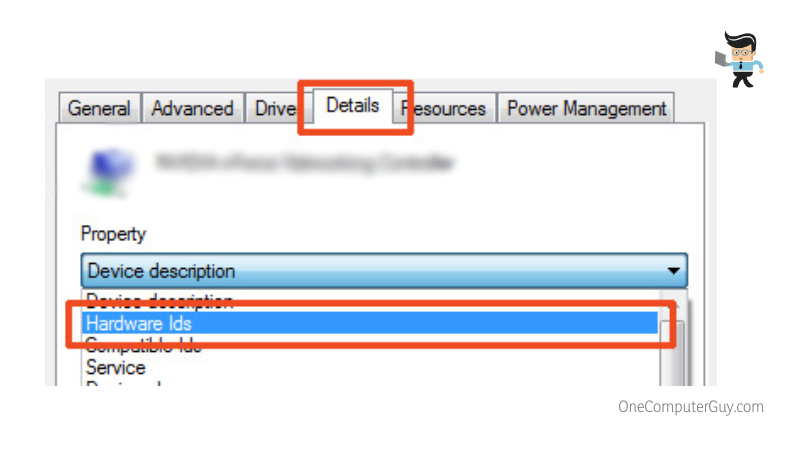
- Navigate to the “Details” tab and click on “Hardware IDs” from the list of options.
- Right-click on the first hardware ID on the list and choose “Copy” from the options.
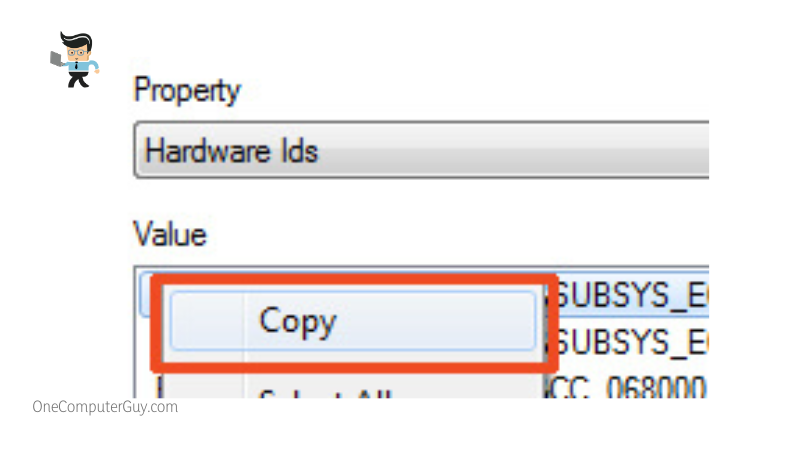
- Paste the copied item in a note or write it down on a piece of paper.
- Now, go to your internet-enabled device and search for the ID you copied.
- Select websites that have the driver and check to see if there are updated versions.
- Download the driver update and make sure you only download from websites you trust.
- Install the downloaded driver on the problematic computer and restart your PC.
- Once your computer boots back up, check to see if your Wi-Fi network now works properly.
– Renew Your IP Address
IP address conflicts can cause your computer’s Wi-Fi to malfunction. Renewing your laptop’s IP address is the best way to resolve this issue.
You can do so by following the steps below:
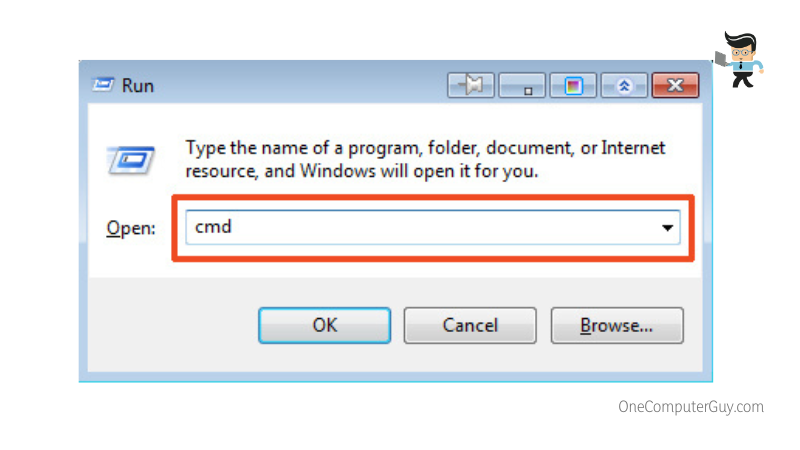
- Press the R button and Windows key at the same time to open the “Run” dialog box.
- Type in “cmd” into the dialog box and press the enter key.
- In the command prompt window, type in the command “ipconfig/release” and press the enter key.
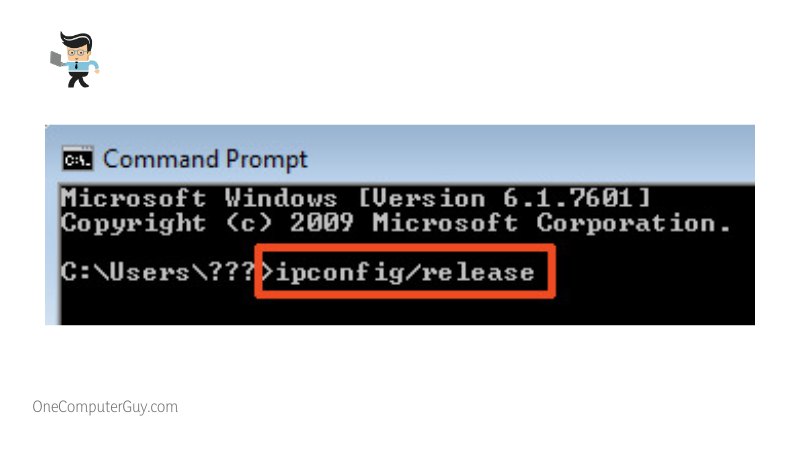
- Wait for the command to run and once it’s done, type in the command “ipconfig/renew” and press the enter key.
- The new command will also take a moment to run so you may have to wait for a while.
- Once the command is complete, check to see if your Wi-Fi connects successfully.
– Changing Your Wi-Fi Protocol
If your computer’s wireless protocol isn’t supported by your router, you can experience disconnection issues.
To change your computer’s wireless protocol, all you have to do is:
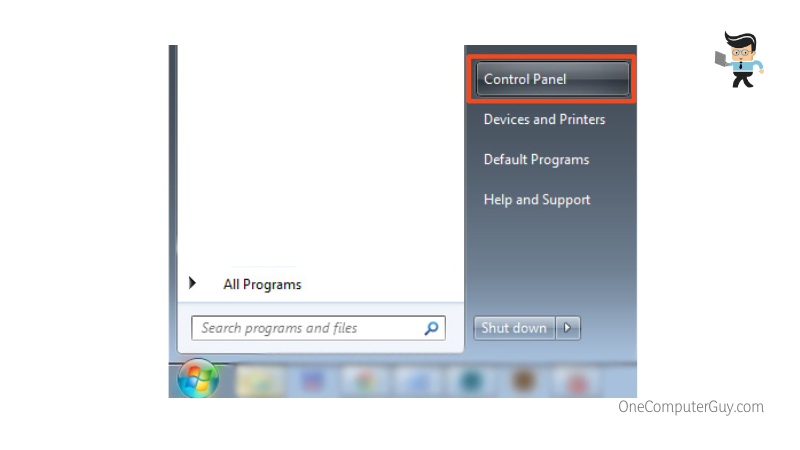
- Click on the search icon beside your start menu, search for “Control panel” and choose the topmost option.
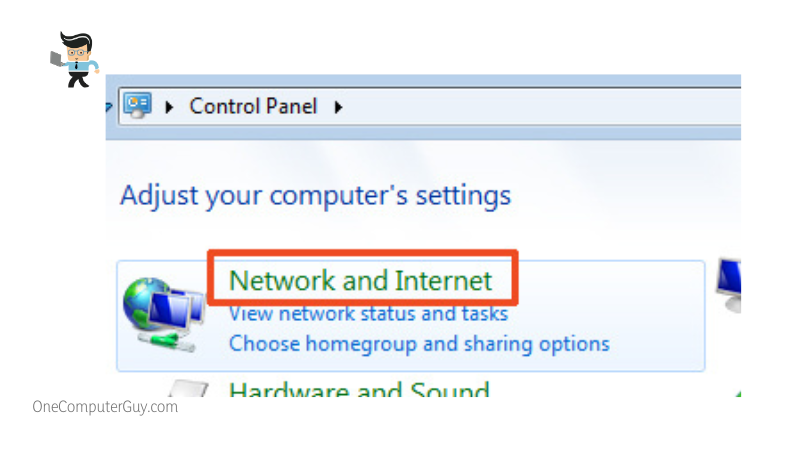
- In the control panel window, choose the “Network and Internet” option.
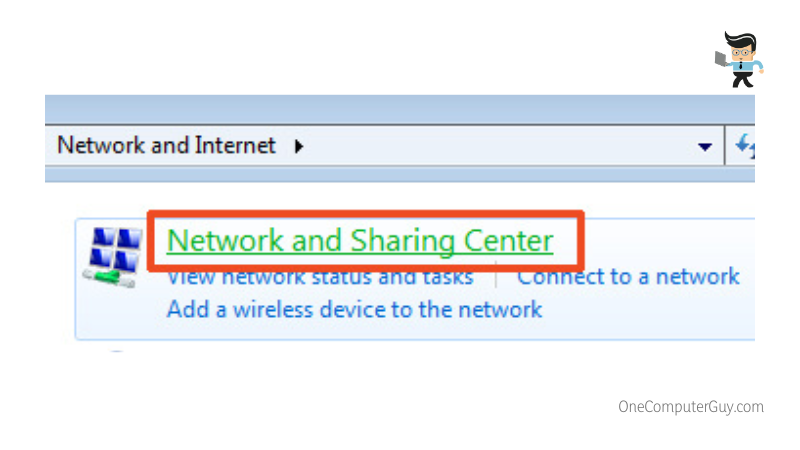
- On the next window, select “Network and Sharing Center.”
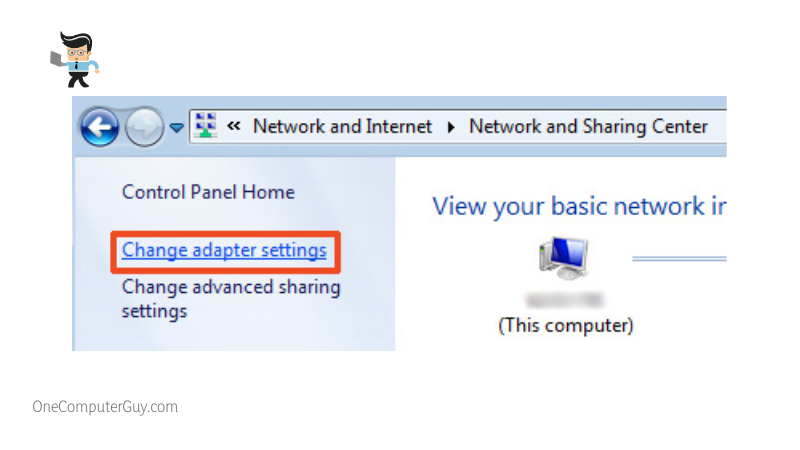
- Now, select “Change adapter settings” from the list of options on the left.
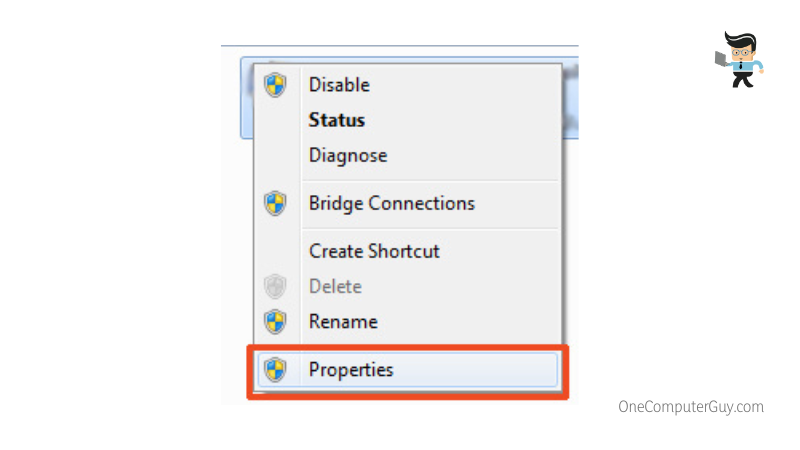
- Right-click on the “WiFi” option and select “Properties” from the list of options.
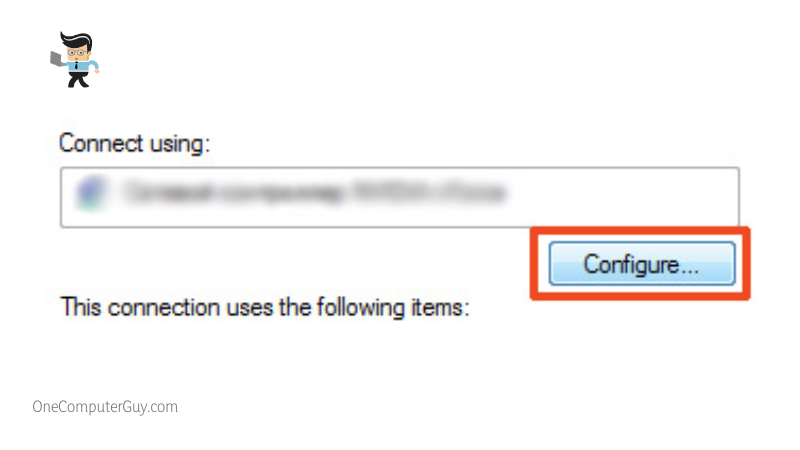
- Click on “Configure” on the next window.
- Then go to the “Advanced” tab.
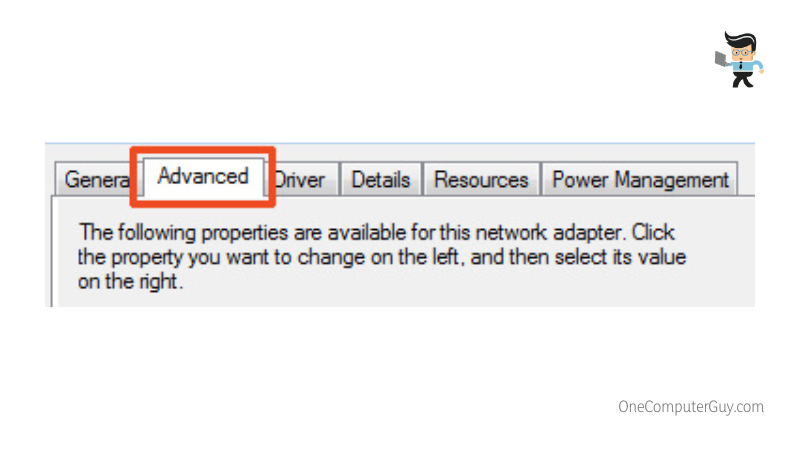
- Select the “802.11 abg” option under the “Property tab.”
- Now go to the “Value” tab on the right and choose “Dual-band 802.11 abg” from the list of options.
- Click on “Ok” to save your settings and close all windows.
- Now check to see if your computer connects to your router.
– Restart or Reset Your Router
If your computer’s Wi-Fi still doesn’t work after trying all the steps above, the problem may not be with your computer but with your router. You can restart or reset your router to its default setting and try connecting your PC.
Conclusion
Hopefully, you’ve been able to get your computer’s Wi-Fi to work with our network troubleshooting steps. Let’s sum up the important points we mentioned to make sure you have all you need to fix your Wi-Fi problem:
- Check to see if your Wi-Fi is on and your device isn’t on airplane mode.
- Make sure your router and computer have matching protocols so they can work properly.
- Use the Windows Troubleshooter to diagnose and apply automatic fixes.
- You’ll need an internet-enabled device to download a driver update.
- Make sure you download updates from trusted websites only.
If you’re unable to determine the problem, you can call your ISP to verify whether or not your router and/or modem are the problem. Once you’ve verified that your router isn’t the problem, you’ll need to call a professional as the fault may be a hardware problem and not a software issue.


