
Navigating the CPU debug light MSI motherboard conundrum is like unraveling an intricate tech enigma that often bewilders many. As we delve into the labyrinth of the MSI motherboard’s CPU debug LED, we’ll demystify the ominous red light, usually the harbinger of potential hardware snags.
Shedding light on this matter, we’ll also consider the underrated role of the CMOS battery and its mysterious connection to this vexing issue. Join us as we chart this compelling course to ensure your CPU light guides you toward maximum performance rather than leading you astray.
Contents
Why Is the CPU Debug Light on MSI Motherboards Appearing?
The CPU debug light MSI B550 motherboard generally appears when there are hardware issues, specifically with the CPU. This might be due to improper installation, compatibility issues, or a faulty CPU. Regular inspection and maintenance can prevent this indicator from illuminating, although the fixes are sometimes complex.
Have you ever powered up your computer to find the CPU debug light on your MSI motherboard stubbornly shining? Like an enigmatic oracle, this indicator light can leave many users needing clarification about its meaning. While its exact cause may vary, this light generally points to a challenge with your CPU.
One common scenario involves the debug LEDs that come built into your motherboard. These LEDs work as diagnostic tools that help identify potential issues with various hardware components. A constant illumination of the CPU debug light could indicate a problematic CPU installation or even compatibility problems with your system setup.
Another instance that can result in the CPU debug light appearing is when using the MSI EZ Debug LED feature. This feature, specially designed by MSI, provides an array of LEDs to indicate the operational status of critical components during the boot process. So, when you see the EZ Debug LED CPU white light, it is usually a cue that the motherboard is having trouble recognizing the CPU or malfunctioning.
Yet another predicament that could cause the CPU debug light to turn on involves an issue with the VGA interface. The VGA debug light MSI motherboard has been specially engineered to alert the user about potential problems with the graphics interface. Although it’s a separate debug light from the CPU light, in some instances, issues with your graphics card or interface can cause your motherboard to misread the CPU status, leading to the CPU debug light turning on.
Finally, it is essential to decipher the MSI debug LED codes to understand the issues at hand better. Each MSI motherboard has a unique set of LED codes denoting different hardware statuses. Understanding these codes can help diagnose what might be causing the CPU debug light to turn on. Remember that each situation is unique, and what works in one scenario might not apply to another.
– Problematic CPU Installation
Every computer wizard knows that the CPU is the brain of any computer. However, just like installing a brain into a robotic body in a sci-fi movie, putting the CPU onto a motherboard has complexities. Each step is crucial, from ensuring the processor fits right into the motherboard socket to confirming the notches’ alignment.
A single misstep can cause issues, with the CPU debug light on the MSI motherboard serving as a telltale sign of a problematic CPU installation. One typical example is when the CPU isn’t positioned correctly. You might place it into the socket, which might seem like a perfect fit. However, if the alignment is slightly off, it can lead to the CPU debugging light glowing, signaling a potential problem.
– The Motherboard Fails to Recognize the CPU
The relationship between a CPU and its motherboard resembles a dance, where both partners must move in sync. When this harmony breaks down, the motherboard may fail to recognize the CPU. This could be due to compatibility issues, where the CPU and motherboard are puzzle pieces that must fit together.
Another possibility is the case of a BIOS version that doesn’t support the installed CPU. For example, you upgrade your CPU but must remember to update your BIOS. Suddenly, the CPU debug light on your MSI motherboard is flashing, indicating that your motherboard can’t recognize the new CPU.
– Issues with the VGA Interface
Sometimes, the source of the CPU debug light problem isn’t the CPU itself but another component, such as the VGA interface. VGA, short for Video Graphics Array, handles the visuals on your PC. If your VGA interface malfunctions, the CPU debug light on the MSI motherboard can be triggered.
For instance, imagine you just installed a brand-new graphics card. You boot up the system, and instead of being greeted with a successful startup, the CPU debug light shines, leaving you puzzled. Despite the new graphics card working fine, the VGA interface isn’t properly communicating with the motherboard, leading to the CPU debug light turning on.
How to Fix the CPU Debug Light on MSI Motherboards? Advanced Fixes
Fixing the CPU debug light on MSI motherboards can involve several steps. First, ensure the CPU is correctly installed and compatible with your motherboard. Updating your BIOS may help if your motherboard fails to recognize the CPU. Inspect your graphics card and its connection to the motherboard for VGA issues.
Firstly, let’s talk about CPU installation. The key here is precision. Make sure the processor is placed correctly in the motherboard socket. Pay close attention to the alignment of the notches and the pins. A seemingly perfect fit could cause issues if the alignment is off by even a slight margin. Also, ensure the CPU is compatible with your motherboard, as this can often be a hidden cause of the problem.
Moving onto the second scenario, we tackle situations where the motherboard fails to recognize the CPU. In such cases, updating your BIOS might be the answer. Older versions of BIOS may not recognize newer CPUs, leading to the CPU debug light turning on. Ensure your BIOS is current, and compatibility issues should be reduced significantly.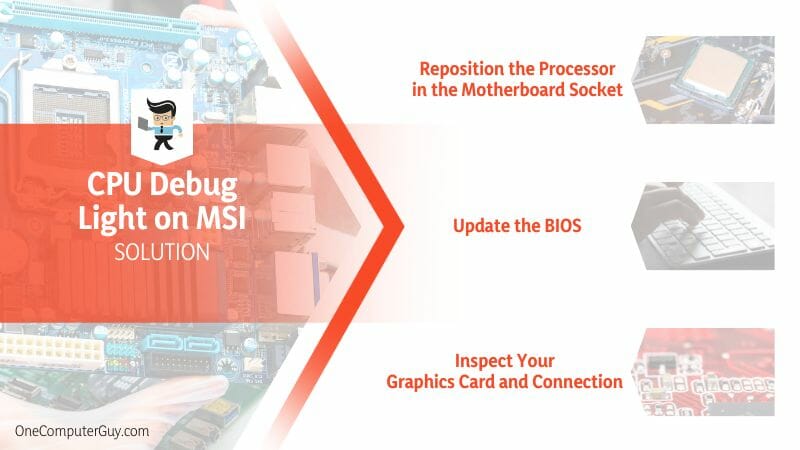
Lastly, we address issues with the VGA interface. This might seem unrelated to the CPU, but a malfunctioning VGA interface can trigger the CPU debug light. Carefully inspect your graphics card, check its connection with the motherboard, and ensure the graphics drivers are current.
Remember, every case is unique, and what works in one situation may not work in another. But by systematically checking these areas, we can increase our chances of finding the solution to that stubbornly shining CPU debug light.
– Reposition the Processor in the Motherboard Socket
Repositioning the CPU in the motherboard socket sometimes feels like a high-stakes puzzle. However, with a bit of patience and care, it becomes a manageable task. Here are the steps:
- Power down your computer and unplug it from the power source.
- Open the CPU socket by lifting the lever. Remove the CPU very carefully, avoiding any contact with the pins.
- Check for any bent or broken pins. If they’re all in good condition, proceed to the next step.
- Now, observe the CPU’s notches and the socket’s corresponding notches. Align them carefully, ensuring the CPU fits snugly.
- Once confident about the alignment, gently lower the CPU into the socket. Do not apply force.
- Close the socket and lock the lever.
– Update the BIOS
Sometimes, a simple BIOS update can resolve the CPU debug light issue. However, updating the BIOS should be done cautiously, as it could potentially harm your system if not done correctly. Follow these steps:
- Identify your motherboard model. You can find this information in the system information of your computer.
- Go to the manufacturer’s official website and look for the latest BIOS form for your specific motherboard model.
- Download the update and save it onto a USB flash drive.
- Restart your setup and enter the BIOS setup.
- Choose to update the BIOS and select the update file from your USB drive.
- Follow the on-screen instructions to complete the update.
– Inspect Your Graphics Card and Connection
Issues with the VGA interface could also trigger the CPU debug light. To resolve this, you might need to inspect your graphics card and its connection:
- Power down your computer and unplug it.
- Open the computer case and find the graphics card.
- Unseat the graphics card from the motherboard slot.
- Inspect the card for any visible damage. Also, check the slot for any dirt or wear.
- If the card and space seem fine, reseat the card into the slot, ensuring it fits securely.
- Close the computer case, plug in your computer, and start it up.
Conclusion
Embarking through the intricacies of MSI motherboards and the mysterious CPU debug light can be challenging, but we can conquer it with careful navigation. Understanding the causes and fixes for this enigma allows us to ensure our setups operate at peak performance, as confirmed here:
- The CPU debug light can illuminate due to problems with the CPU installation, motherboard-CPU recognition issues, or VGA interface complications.
- Proper CPU positioning, BIOS updates, and careful inspection of the graphics card and its connection can help resolve these issues.
- Knowledge of MSI debugging LED codes is crucial for diagnosing potential hardware problems.
Remember, every setback is a chance to learn and grow. With determination and perseverance, we can turn these hurdles into solutions for an optimized and efficient computer setup.


