A computer setup checklist is a comprehensive list of factors to check to ensure you enjoy the best computing performance. Many people think their PC is all good straight out of the box, but unfortunately, this isn’t always the case.
Therefore, it’s essential that you go through this new computer setup checklist to make sure your computer is in the best condition. Read along as our computer geeks walk you through the necessary factors to check when purchasing a new PC.
Contents
New Computer Installation Checklist
– Basic Computer Setup
The basic computer setup starts from when you unbox your PC. First, make sure all cables and connectors are working appropriately. The initial connection includes plugging your monitor, keyboard, mouse, and power cables into the system and making sure none of the cables or ports are faulty.
Once you’ve assessed and confirmed that the initial connection is okay, power on your PC for the basic computer setup. For users who haven’t upgraded to Windows 10 or 11, or those who haven’t set up a PC in a while, you’ll have a different interface to work with. Windows 10 or 11 will ask you to perform some basic actions such as setting up your calendar, location, clock, language, and time zone.
– Windows Profile and Log In
Once you’re done with the initial settings, Windows will prompt you to create a Windows login for your PC. You’ll need to log in to an existing Microsoft account or create a new one for this step. The account you create will be used for other Microsoft services, including Xbox, Skype. Office, OneDrive, Edge Browser login, and more.
Having a Microsoft account also allows you to sync your settings and wallpapers so you don’t have to repeat the same steps on other Microsoft devices you might own.
If you’re not connected to the internet or simply don’t want a Microsoft account, you’ll get the option to create a local account. You’ll also get the option to create other accounts, for instance, a family or kids’ account if anyone else will be using your PC. While you don’t necessarily have to set that up on the first start, it’s still good to know that you can.
– Remove Bloatware
The second factor on our new computer installation checklist is removing bloatware. Otherwise known as shovelware, bundleware, begware, and crapware, bloatware is a series of apps pre-installed on your system by the manufacturer or vendor you bought the PC from.
Many of these apps offer no significant contributions to your PC’s health, performance, or maintenance. Vendors like to portray these apps as helpful apps, but most of the time, the apps are there to help the vendor get money from software developers. There’s almost a 100 percent guarantee you’ll find bloatware on your retail-bought computer and less so on a PC sold for business purposes.
Note that bloatware and trialware aren’t the same. A trialware is the trial version of an app you might want, such as an antivirus. You’ll have access to the app for a limited period and get the option to buy the full version.
Uninstalling bloatware is straightforward. Simply go into your computer’s settings, click on Apps, search for the software, double click it and select uninstall.
– Secure Your PC
The next step on our new PC setup checklist is securing your computer. Protecting your PC from malware, viruses, phishing attacks, and other security problems should be on top of your priority list. You can easily secure your PC by downloading an antivirus or anti-malware app with the capability to scan and remove viruses from your computer.
Good examples of free antiviruses include Avast Free Antivirus, Kaspersky Security Cloud Free, and Norton 360. These antiviruses have paid versions that offer even more security features, such as anti-spam tools, firewalls, parental controls, and more.
Windows also has its own antivirus tool, which has become even more efficient over the years. Known as the Microsoft Windows Defender Security, this free antivirus from Microsoft allows you to enjoy as many features as the free versions of the aforementioned software.
Remember that when you install and activate a third-party anti-virus tool like Avast, the Windows Defender will automatically become dormant and will only spring back to life if it notices that there’s no antivirus tool on your computer.
– Update Your PC
Updating your PC is the next option to tick off our PC deployment checklist. Windows 10 gets two major updates in a year, and you may not have the current update when you purchase your PC. Once you’ve finished the basic computer setup, Windows will automatically search for updates for itself as well as the drivers and compatible software on your PC.
This part may be skipped if you aren’t connected to the internet. But once you’re connected, make sure you grab those updates immediately. To update your computer, simply click on Settings, select Update & Security, and click on Windows update. Regularly updating your PC, drivers, and software will make sure you enjoy better performance and security features.
When you click on Windows Update, your system will automatically search the internet for an update and provide you with a list of important and secondary updates. It’s recommended that you download all updates available. Note that updating your PC may take a while, depending on how fast your internet is. Just leave it and let it run its course.
When all downloads are done, and installation is complete, you’ll be prompted to restart your PC. When your computer boots back up, click on Windows Update again. Since your computer is a new one, you may need to update your Windows software and drivers about three times to get to the current version.
You can also delay an update by seven days if you feel the updates are getting in your way or becoming too much. You also have the option to set active hours, which means that Windows won’t update when you’re working within the preset time. This method allows you to download updates overnight or on weekends only.
– Create Backup and Recovery
Yes, your computer is new and will most likely run for years before anything happens to it. But backing up your data and setting up recovery should be done as soon as possible as you can never predict the future. Sometimes, PCs develop errors or faults that’ll require users to reinstall the complete OS, which means you’re likely to lose all your files.
Windows 10 always tries to salvage your data and prevent you from performing a complete reinstall during an unexpected crisis. It’ll provide you with a recovery utility tool that helps you get a new start and a chance to keep your files. However, a new start means having to update your PC all over again.
Creating a backup will save you from the stress that comes with both complete reinstallation and using the recovery utility tool. You’ll be able to restore your PC to how it was when you performed the latest backup.
You’ll need a recovery drive to create a backup. The drive can be a partition on your local disk, an external drive, a USB drive, or even a CD if your PC uses a disk drive.
Follow the steps below to create a backup of your system:
- Plug your drive into the computer if you are using an external or USB drive
- Click on the search icon beside your Start menu
- Search for Recovery Drive and click on it
- The next window will be the recovery drive window
- Check the box beside “Backup system files to recovery drive”
- Click on Next and wait for the system to find your external drive
- If you have multiple drives plugged in, you’ll get a list which you can choose the right drive from
- Click on Next, and you’ll get a notification saying everything on the drive will be deleted
- You want to make sure the drive you’re using is clean and has no useful file
- Click on create and wait for the system to back up your files and apps
- Once the process is finished, click on Finish to exit the screen
– Choose Your Browser
Windows chooses the Microsoft Edge browser as your default browser. However, you can change it to any browser you like. While you can’t uninstall Edge, you can download other browsers like Chrome and Firefox. It’s worth mentioning that Microsoft Edge has undergone many different changes over the years and can now be considered as one of the top browsers around.
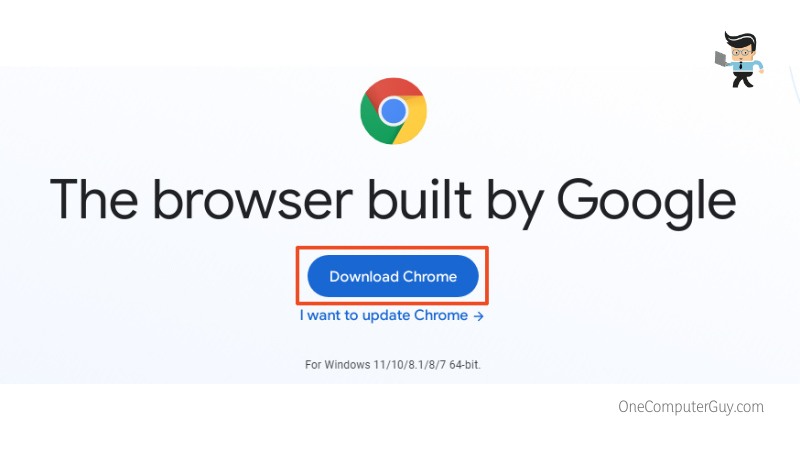
However, that doesn’t mean you should settle for Edge, especially if you’re a Chrome user and have all your favorite websites and passwords synced to Google Chrome. Simply open Edge, go to Google or Mozilla’s website and download your favorite browser.
- Once done, head to settings
- Click on Apps and select Default apps
- Under the Web Browser category, choose Google Chrome, Firefox, or any browser you’ve downloaded
- You’ll get a list of browser icons
- Select the one you want to set as your default browser and click on ok
– Register Your Computer
Registering your computer as well as the software and peripherals attached to it can be quite helpful in the future. While it doesn’t guarantee that you’ll get the best technical support, it’ll help you get recognized when you eventually need help from the manufacturers or creators of your computer, peripherals, and software.
You’ll be able to utilize your warranty easily, and if there’s any problem where the company needs to recall some devices, you won’t be left out. You can register your devices, software, and peripherals online. Make sure you opt out of promotional emails if you don’t want multiple emails disturbing your inbox.
Conclusion
That’s all we have for you on the computer setup checklist.
Below are some reminders to make sure you set up your PC the right way:
- Make sure you register everything on your computer, including your software and computer peripherals
- Back up your computer regularly so you won’t lose important data when something unexpected happens to your system
- Check your connectors, cables, ports, and buttons to make sure everything is working normally
- Remove bloatware from your PC to free up space
- Make sure you run multiple Windows Update until you have the current version of Windows
- You can create an online Windows profile for your login or use a local account if you’re not connected to the internet
- Remember to secure your PC with an efficient antivirus, such as Avast and Norton
- Windows Defender is also a good security tool
- Your PC can’t use more than one antivirus at a time, so Windows Defender will become dormant if you activate a third-party antivirus
Once you’ve taken the steps listed in our PC deployment checklist above, you’ll be ready to roll with your new PC. While there are other tasks, you can still perform, such as file transfers, customizing your wallpaper, and more, you can do those tasks leisurely.
For now, enjoy the fact that your PC is now secure, and you’re all set should there be an unexpected event that puts your computer at risk. Your files are recoverable, and you can surf the web with your most trusted browser without worrying about viruses or malware attacks.

