The following is a basic overview on the new Windows8 Installation Process |
|
| 1. | Make sure your computer is configured to boot from the DVD before the hard drive. This is typically set in your system’s BIOS or with a key you can press during the start up of your computer to select the boot devices. |
| 2. | Also make sure you have the product key available |
| 3. | Boot from the Windows8 DVD |
| 4. | Early on the screen will be blank for a few minutes. This is normal. |
| 5. | You will be prompted for the Language, Time and Currency Format, and the Keyboard. Select which is appropriate for you and click on the Next button. |
 |
|
| 6. | Click on the Install now button. |
 |
|
| 7. | You will then see a Setup is starting window |
 |
|
| 8. | Enter your Product Key |
 |
|
| 9. | Accept the License Agreement |
 |
|
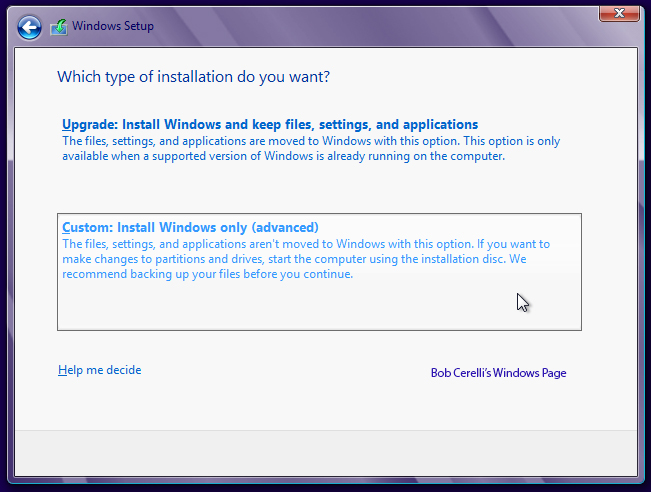
| 10. | If you want to have a custom sized partition, make that selection. Otherwise select the first option. |
 |
|
| 11. | If you selected a Custom install, you can then select Drive Options, Del Partition (if there already was one on the hard drive), New, Select the size of the partition for the operating system and programs (typically something like 150000 megs or 150 gigs is plenty, I leave the rest for data). |
| 12 | From here the install will start Copying files etc. |
 |
|
| 13. | After Finishing up, the computer will reboot |
| 14. | There are still some things to automatically finish with the installation such as Getting Devices Ready. |
| 15. | You will then show a screen for Personalize, Wireless, Settings and Sing in, which will automatically progress to Personalize |
 |
|
| 16. | You can then select the color you like and the name of the computer |
 |
|
| 17. | You then have the option to change some of the default settings. Typically I recommend leaving these set as they are. |
 |
|
| 18. | Next you are prompted for the user account you want to create. |
| 19. | If you have an account with Microsoft (or want to create one), you can enter in your e-mail address. The advantage is in using the Microsoft Store for software and utilities (some of which a free) as well as syncing some settings between computers. |
| 20. | The other option is to Sign in without a Microsoft account. This is more typical of how it was done with previous operating systems. |
 |
|
| 21. | Windows will then Create the Account and Finalize Settings |
| 22. | After that you will be presented with the default Start Screen. |
 |
|
This site is copyrighted. No portion may be reproduced without my written permission.


