Installing File Sharing on the Server |
|
|---|---|
| 1. | Open up the Control Panel |
| 2. | Double click on the Network icon |
| 3. | Click on the File and Print Sharing button |
| 4. | Check the I want to give others access to my files box |
| 5. | Click on the OK box twice |
| 6. | Click on the Yes box to restart Windows95 |
Installing Microsoft Fax |
|
|---|---|
| 1. | Open up the Control Panel |
| 2. | Go to Add/Remove Programs |
| 3. | Click on the Windows Setup tab |
| 4. | Check Microsoft Fax |
| 5. | Click on the OK button |
| 6. | Exchange will be installed as well |
| 7. | This will need to be done on both the server and clients. Do the server first. |
Configuring the Fax Server |
|
|---|---|
| 1. | Open up the Control Panel |
| 2. | Double Click on the Mail/Fax icon |
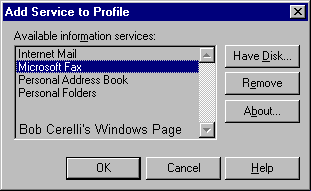
| 3. | Click on the Add button |
| 4. | Select Microsoft Fax and click on the OK button |
 |
|
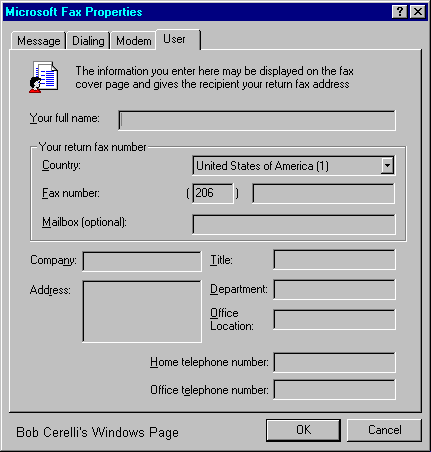
| 5. | You need to enter your Name, Fax Number etc for information that can be displayed on a cover sheet. |
 |
|
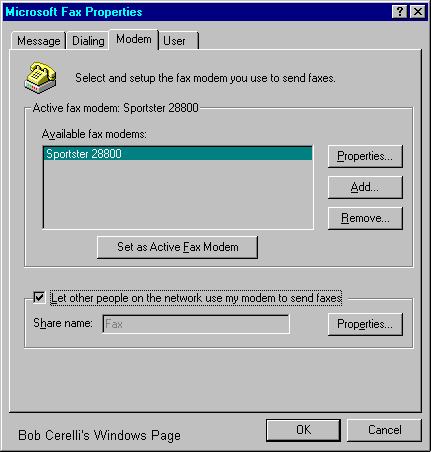
| 6. | Click on the Modem tab |
 |
|
| 7. | Check the Let other people on the network use my modem to send faxes box |
| 8. | Click on the Properties button |
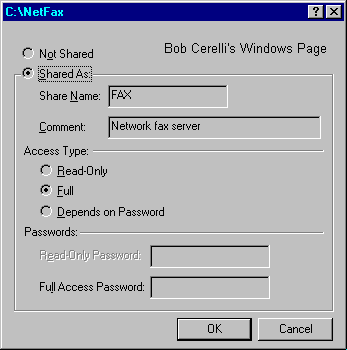
| 9. | Enter the name of the shared directory and a password if you want one. |
 |
|
| 10. | Click on the OK button |
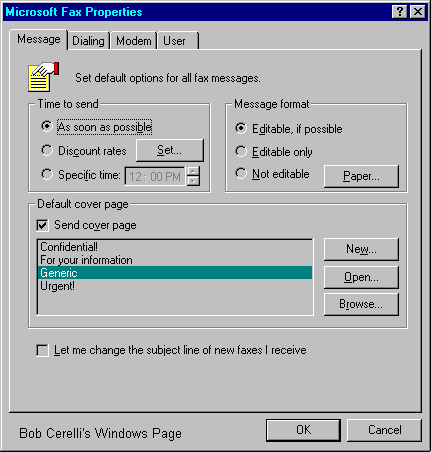
| 11. | Click on the Message tab |
| 12. | From here you can change the cover page and when to send the fax. |
 |
|
| 13. | Click on the OK button twice when you are finished |
| 14. | Exchange must always be running on the server and the modem must be turned on before Exchange is started. |
Configuring the Client |
|
|---|---|
| 1. | Open up the Control Panel |
| 2. | Double Click on the Mail/Fax icon |
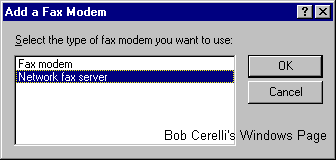
| 3. | Click on the Add button |
| 4. | Select Network Fax Server and click on the OK button |
 |
|
| 5. | When you are prompted for the Network Fax directory, enter the UNC name to the Fax server you created in the steps above.For example, it the server’s computer name is FAXSERVER and the directory you shared was FAX, the UNC name would be \\FAXSERVER\FAX |
This site is copyrighted. No portion may be reproduced without my written permission.


