| 1. | Logon to the Windows 2000 domain |
| 2. | Go to the Control Panel / Printers or Start Menu / Settings / Printers |
| 3. | Click on the Add Printer icon |
| 4. | Click on the Next button |
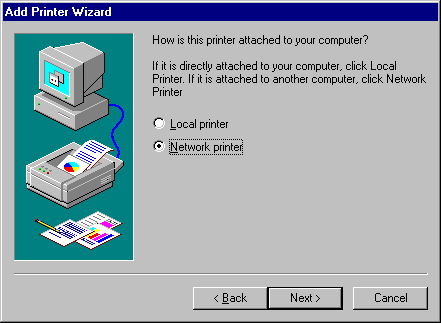
| 5. | Check Network Printer |
| 6. | Click on the Next button |
 |
|
| If you have the Windows95 Client Upgrade If you do not have the Windows95 Client Upgrade |
|
| If you do have the Windows9x Client Upgrade: | |
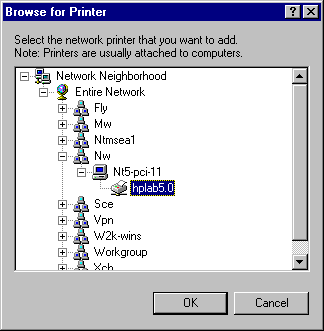
| 1. | Click on the Browse button |
| 2. | Browse to the domain, server and printer you want to install |
| 3. | Click on the OK button |
 |
|
| 4. | Go to Finish Windows95 Printer Install |
| If you do not have the Windows95 Client Upgrade: | |
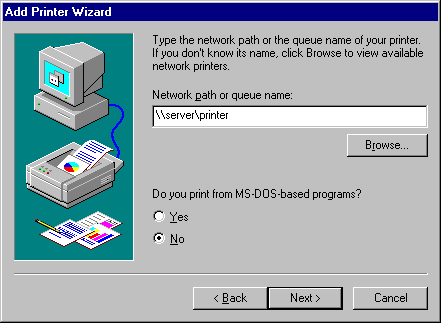
| 1. | Enter the Server and Printer name Note: You cannot browse the active directory without the client pack installed. |
| 2. | Click on the Next button |
 |
|
| 3. | Go to Finish Windows95 Printer Install |
Finish Windows9x Printer Install |
|
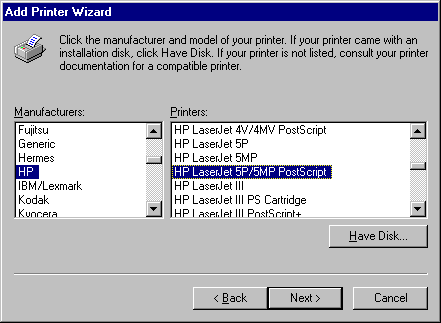
| 1. | Select the type of printer you want to install |
 |
|
| 2. | Enter the Name you want displayed for the printer |
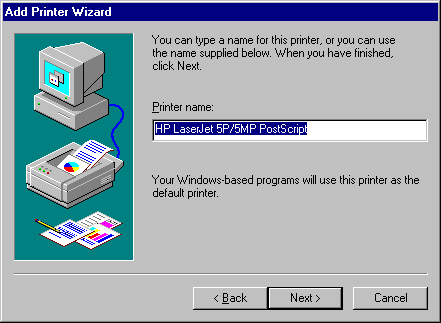 |
|
| 3. | Check Yes if you want to print a test page |
 |
|
| 4. | You will be prompted for the Windows9x drivers if it can’t access them. |


