|
The following is a basic overview on the new Windows7 Installation Process
|
| 1. |
Make sure your computer is configured to boot from the DVD before the hard drive. This is typically set in your system’s BIOS or with a key you can press during the start up of your computer to select the boot devices. |
| 2. |
Also make sure you have the product key available |
 |
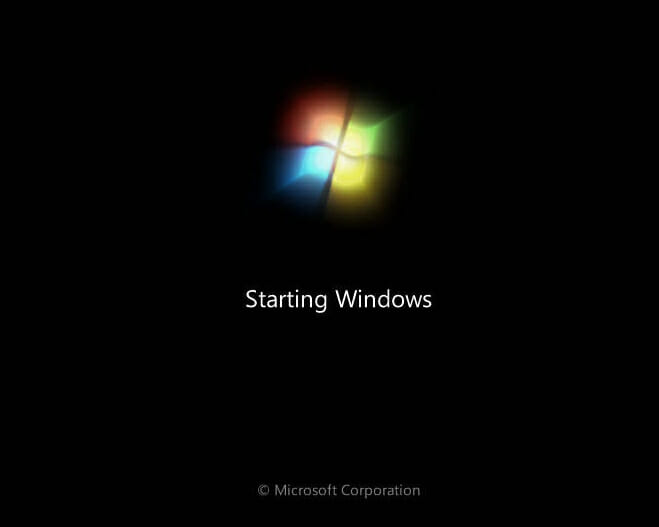
| 3. |
As it boots to the Windows7 DVD, you should see a similar screen to the following screenshot. |
 |
| 4. |
As Windows starts the install, you should see the following screenshot |
 |
| 5. |
At this point, windows is loading the necessary files into memory and nothing is being copied to the hard drive |
| 6. |
You will then see the splash screen again as it loads files onto the computer |
|
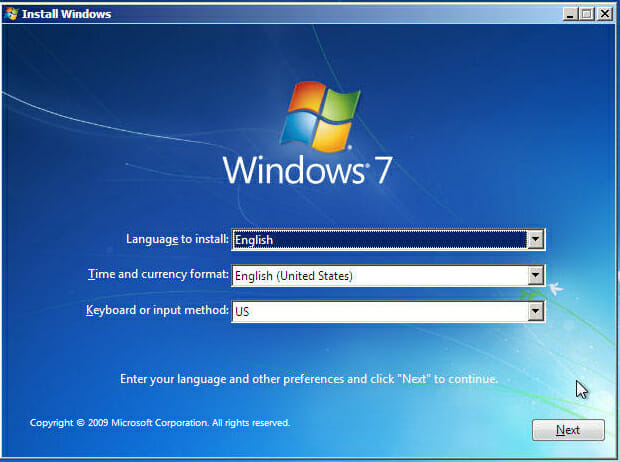
| 7. |
Then select the Language to install, Time and currency format, and Keyboard or input method. |
 |
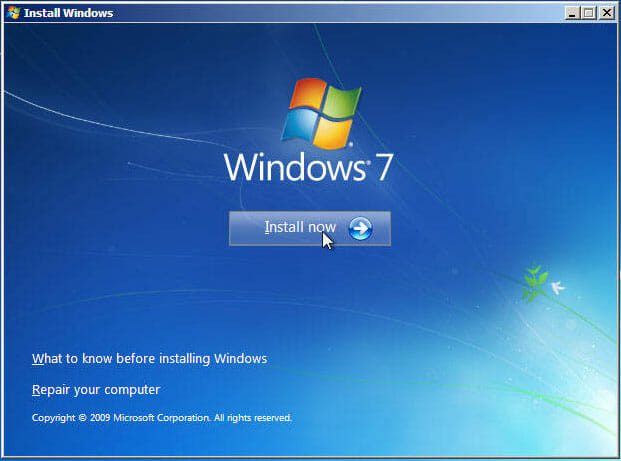
| 8. |
Click on the Install now button |
 |
| 9. |
Then Windows will start the actual setup |
 |
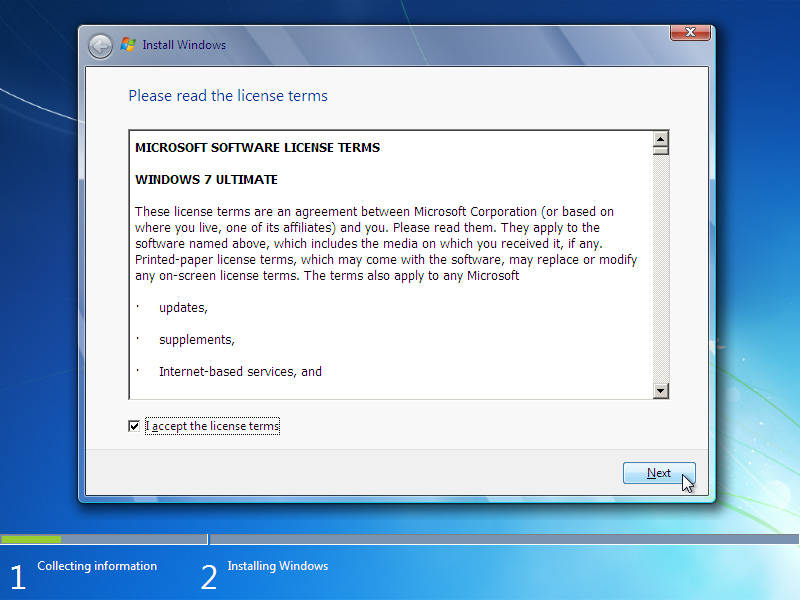
| 10. |
Next will be the screen for accepting the license agreement. Check to accept the license and click on the Next button |
 |
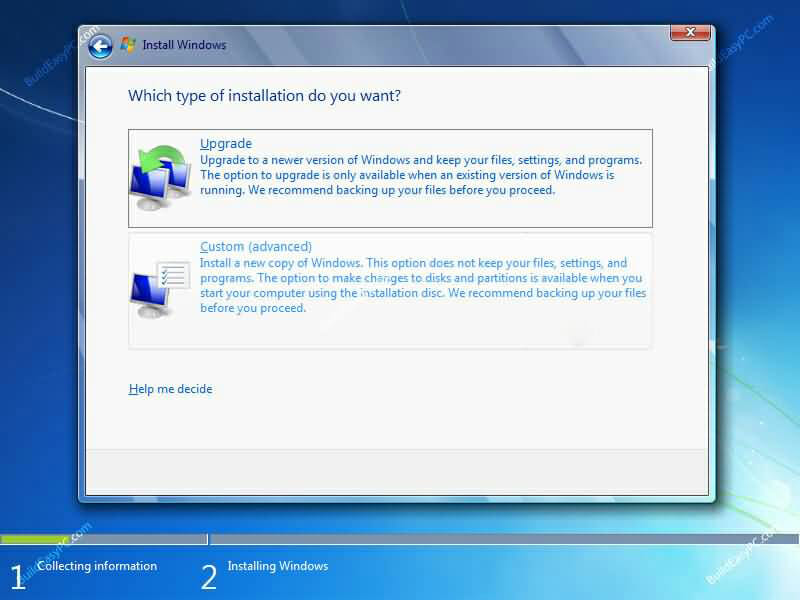
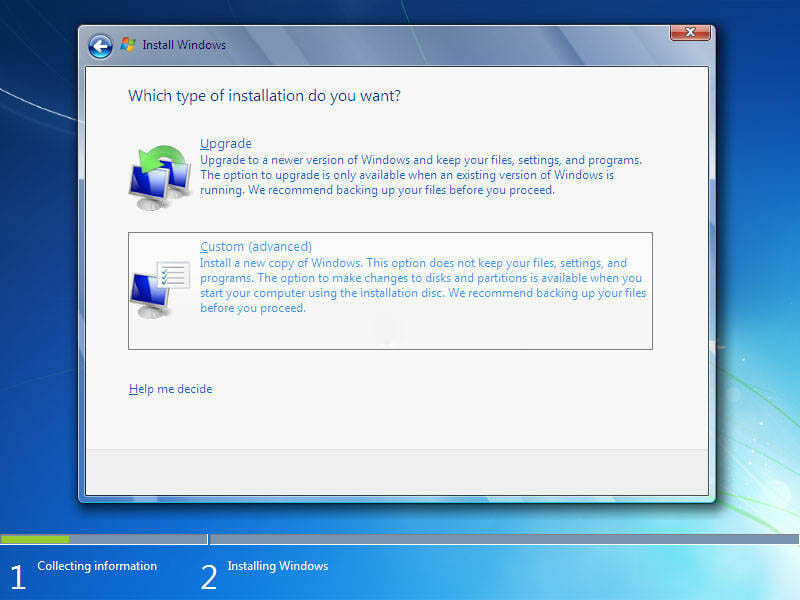
| 11. |
Next choose the type of installation you want, Upgrade or Custom. Upgrade will allow you to upgrade an existing operating system to Windows7. Custom allows you to delete everything and have a completely clean install |
 |
 |
| 12 |
If you choose Custom (advanced) for a clean install, you will be shown the current partitions. Click on Drive Options in the lower right hand corner |
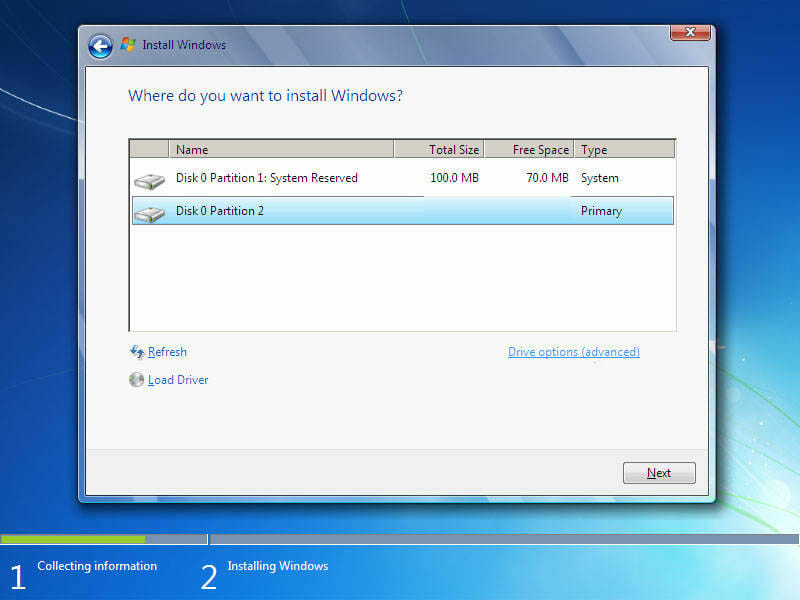 |
| 13. |
From here you can Delete any current partitions |
 |
| 14. |
You can also then create new partitions of whatever size you want. For example, I have two partitions. One partition is for the Operating system and one is for all my Data |
| 15. |
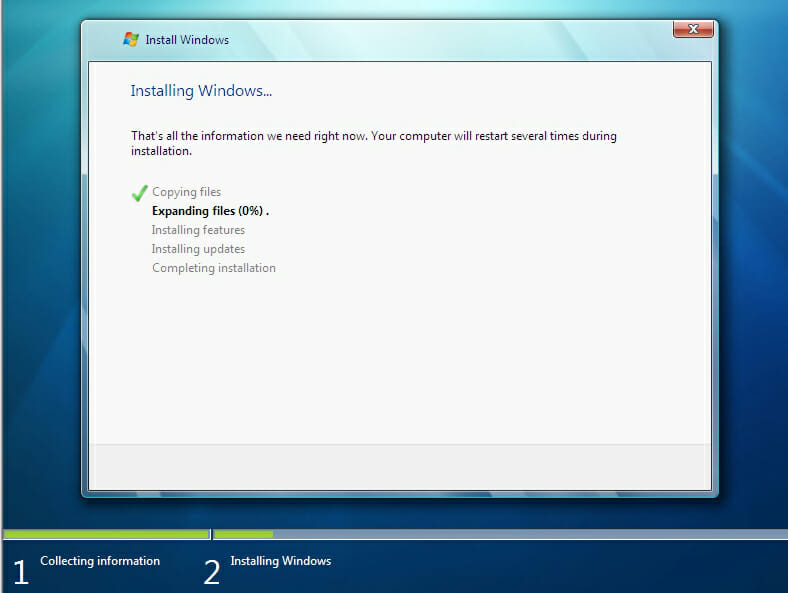
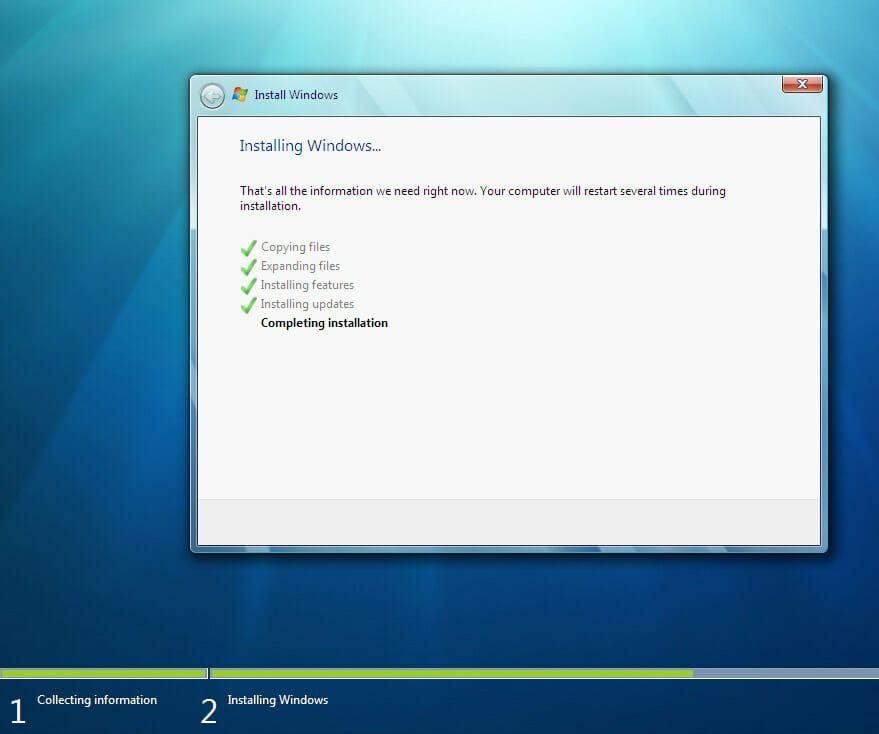
Windows7 will then start copying, expanding and installing the operating system |
 |
| 16. |
It will continue on and then reboot |
| 17. |
It will then show screens for Updating the Registry, Starting Services |
| 18. |
Then it will show Completing installation |
 |
| 19. |
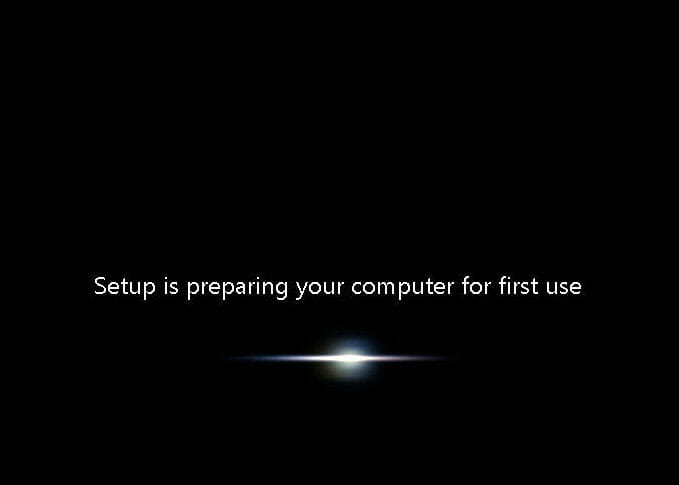
Windows7 will reboot again and preparing for first use |
 |
| 20. |
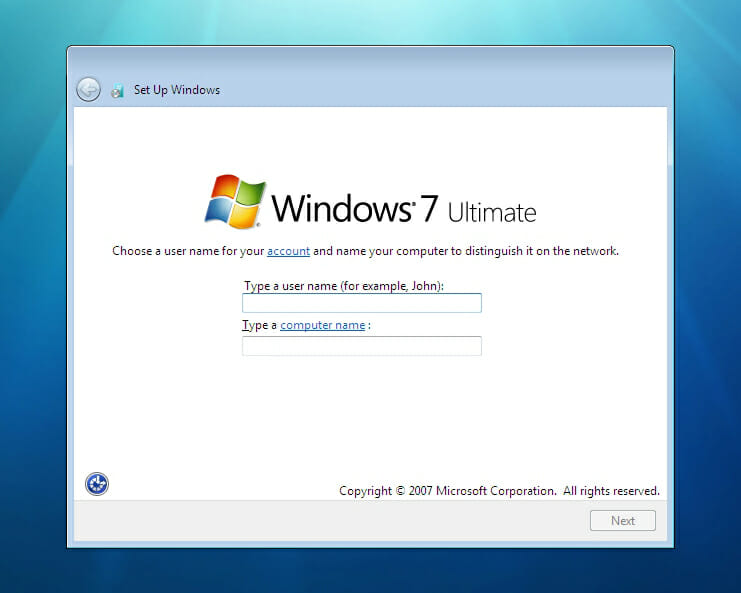
Type in a User name. You can also change the Computer name from the default, which will be based on the User name yo select. |
 |
| 21. |
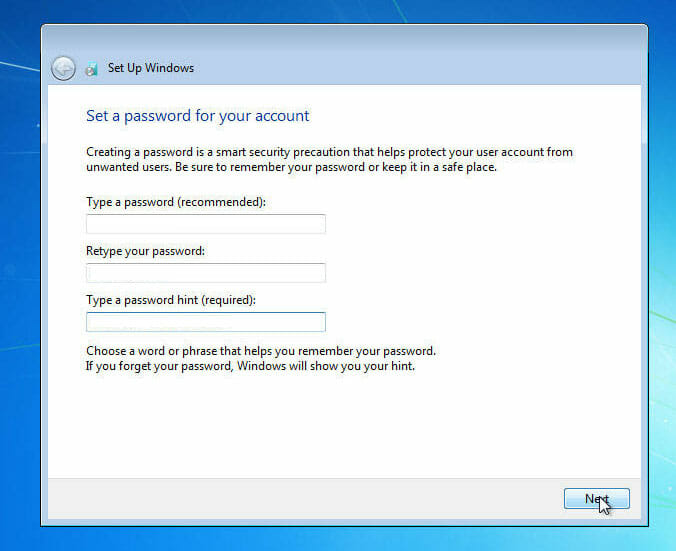
Type in a password and hint |
 |
| 22. |
Type in your product key |
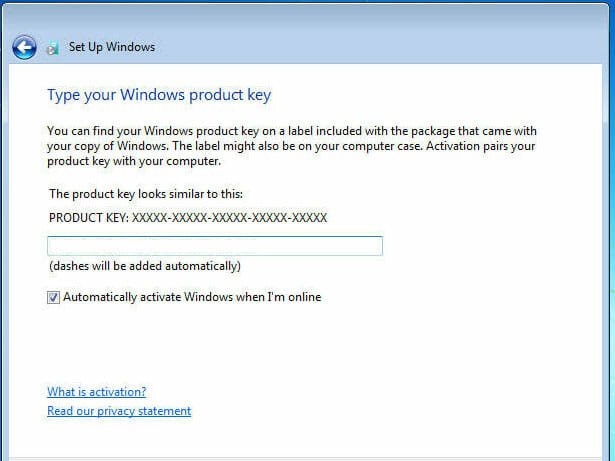 |
| 23. |
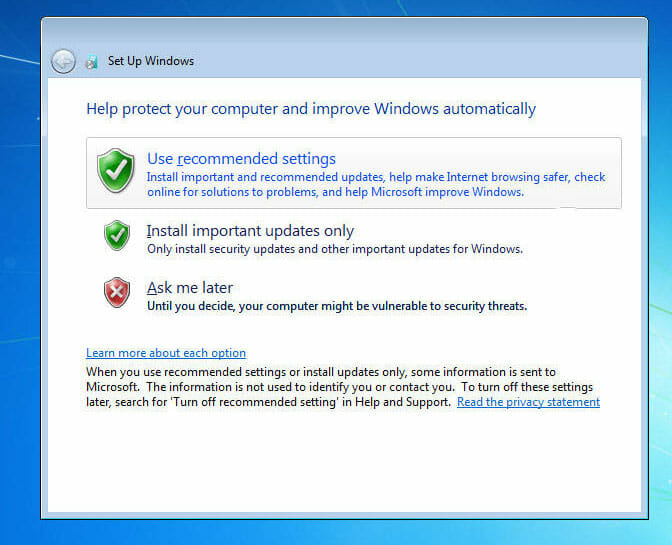
My recommendation is to leave the default for getting updates |
 |
| 24. |
Then select your time zone |
| 25. |
Select whether the network it is currently connected to is a Home, Work or Public network |
 |
| 26. |
Then Windows7 will prepare your initial desktop |
| 27. |
This completes the basic installation of Windows7 |
| 28. |
I have a page for Windows 7 Initial Configuration Changes that I like to do after a new install |


