|
|
The following steps are the basics for installing and configuring Outlook98 or Outlook 2000 |
|
When first installing Outlook, my preference is to choose the Corporate or Workgroup Option.This has several advantages over the Internet Only configuration.
If Outlook was not installed with this option you can add it later. You can tell by which screen you see when you start to add your e-mail account. |
|
 |
|
| 1. | To determine which configuration of Outlook is currently installed, right click on the Outlook icon and select Properties. . |
| 2. | This you see the screen below, you have the Internet Only configuration installed. |
 |
|
| 3. | If you see the screen below, you have the Corporate/Workgroup configuration installed. |
 |
|
| 6. | For configuration instructions, click on the appropriate link for whichever version you have: Internet Only or Corporate/Workgroup |
Outlook98/2000 Internet Only Configuration |
|
| 1. | Click on the Add button |
|
|
| 2 | Enter in your Name |
 |
|
| 3. | Enter in your E-Mail address |
 |
|
| 4. | Enter in the POP and SMTP e-mail servers. These are the servers for sending and receiving e-mail and should have been given to you by your ISP. Sometimes they are the same server and sometimes they are different. |
 |
|
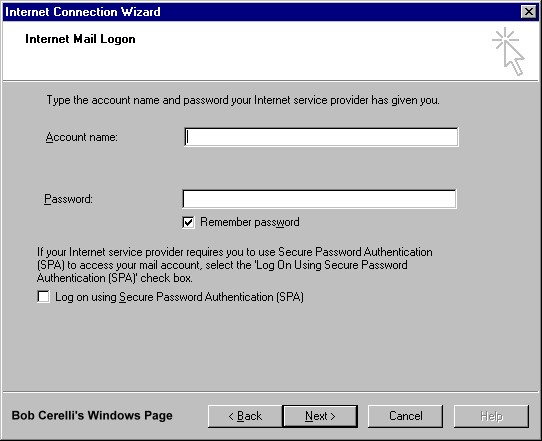
| 5. | Enter in the Account Name and Password. Again this should be given by the ISP. Sometimes the account name is just the beginning of your e-mail address (e.g. bob). Sometimes it requires the entire e-mail address (e.g. [email protected]) |
 |
|
| 6. | Choose you connection method. |
 |
|
| 7. | Click on Next and Finish |
| 8. | When you look at your accounts, it will show the server name. To change this click on the Properties button. |
 |
|
 |
|


Using Folders |
|
| 1. | In order to better organize your mail, you can create folders where you can move your incoming mail. |
| 2. | From the toolbar, select File / Folder / Create |
| 3. | To move mail to a folder, highlight the message(s) you want to move. |
| 4. | Right click with the mouse. Select Move To and then the appropriate Folder |
Assigning Rules |
|
| 1. | You can assign Rules which can be applied to incoming mail. |
| 2. | From the Toolbar, Select Mail / InBox Assistant |
| 3. | When mail arrives that has the To, CC:, From, or Subject fields match criteria you setup, it can be automatically sent to a folder of you choice. |
Exporting Messages to Exchange |
|
| 1. | You can export your Internet Mail Messages, including all folders, into Exchange |
| 2. | Select File / Export / Messages |
| 3. | All your messages, folders, and attachments will be exported into Exchange. If Exchange is running, you will see the folders immediately. |
This site is copyrighted. No portion may be reproduced without my written permission.


